| Author |
Message |
Jump to forum Jump to topic |
| ldfan |
|
Posted: 16 Aug 2020, 02:07
|
|
|
It does sound like a belt issue to me as well. Were you having any other issues before this incident (e.g.: didn't play DVD)? If not, the player sounds very salvageable (I’m actually shocked you considered this on the level of “dead”; not even close).
As rein-o said, unplug the power and remove the case. I would then check to see if your transport assembly is in the raised or lowered position. If it's raised, you'll need to move a gear to drop it down. Once it's lowered, locate the gearing where the loading belt is on and turn it to move the tray out (might even be able to simply pull out the tray manually by just grabbing it but try the gear first).
Another option if you just want to extract the disc quickly might be to just remove the upper clamp assembly and then you might have room to maneuver the disc out of the player. Here are the parts you need to remove (in red)....
(original pic courtesy of "itsvince725')
https://i.vgy.me/71OCxC.jpg
The upper track will still be in the way but like I said you might be able to maneuver the disc out. Just be very careful for the sake of the disc itself.
After you get it out, you'll have to look into whether the loading belt was the issue. If you have never replaced it, it's probably time for a new one. |
|
 |
Jump to forum Jump to topic |
| ldfan |
|
Posted: 17 Aug 2020, 02:27
|
|
|
I think the poster means the noise of the player and not any visual or audible noise from the TV. Anyway, the noise just sounds like the clamper not precisely centering the disc or some other alignment issue.
Take the top cover off and see what it's doing. Also, do all the discs create this noise? How does it sound when playing a CD? |
|
|
Jump to forum Jump to topic |
| ldfan |
|
Posted: 17 Aug 2020, 19:07
|
|
|
Well... if it doesn’t play CD, I think that could very well be a centering issue (but what odotb3 said is very relevant as well). I think Kurtis has mentioned before that the key is to get the CD running first and that might fix the LD issue (picture didn’t look good on LD and that can very well be centering).
Here is the link to hifiengine.com that has the service manual available. You’ll need to create an account to download it.
https://www.hifiengine.com/manual_library/pioneer/cld-1070.shtml |
|
|
Jump to forum Jump to topic |
| ldfan |
|
Posted: 29 Aug 2020, 05:18
|
|
|
| The CLD-V720 is actually based off of the CLD-1090 although its chassis dimensions are taller based on a CLD-2090 because Pioneer wanted to accommodate a row of number buttons on the top for direct access in Karaoke mode. Thus, when comparing the V720 to a V820 (auto reverse version) they almost look identical from the front except for the additional Side A & B buttons on the latter. |
|
|
Jump to forum Jump to topic |
| ldfan |
|
Posted: 21 Sep 2020, 05:11
|
|
|
I looked over the pics for the last hour or so and I think these are the correct points.
SP1 = AC3-RF Out (to middle pin of RCA jack on back panel)
SP2 = AC3-RF Out GND (to GND of RCA jack on back panel)
SP3 = +5vdc
SP4 = Audio FM In
SP5 = Not used (possibly meant for a Mute Active Low player)
SP6 = Mute Active High
SP7 = -5vdc
SP8 = GND
However, I am not 100% certain about SP7 as the boards I have made I always sent -5vdc to the what would be the SQ1 transistor but this circuit design sends it to SQ2 instead (a possible reason is that this SQ2 might be an NPN type transistor and I usually use a PNP type on my boards).
If Kurtis could possibly confirm my analysis, we'll know for sure.
As for your adding the AC3-RF to your 97, here are the points as written up by invenio...
https://drive.google.com/file/d/0B3Or4auin9FnNkpJZE9KVTVzRFk/view
Good luck for when you get your 97 modded. I'll probably mod my 97 in about a year or so; too many other projects I need to work on ;). |
|
|
Jump to forum Jump to topic |
| ldfan |
|
Posted: 24 Sep 2020, 17:23
|
|
|
Big problem though: the digital S/PDIF (TOSLINK) output is borked. Can't plug a cable in, only goes so far then stops dead. It looks like the port is somehow out of alignment and/or blocked inside the case, so I'm trying to plug a cable into what appears to be a metal plate... :wtf:
Can you post a pic of the plug? Might give us a better idea of what might be wrong. Don’t think it’s a hinge flap issue since they were not invented until much later. |
|
|
Jump to forum Jump to topic |
| ldfan |
|
Posted: 28 Sep 2020, 18:02
|
|
|
| Nice!! I remember this unit back in the day. Awesome styling especially that unique look of the detachable touchscreen on the front of the pre-amp. |
|
|
Jump to forum Jump to topic |
| ldfan |
|
Posted: 06 Oct 2020, 07:26
|
|
|
I just "partially" fixed one of my vintage Mitsubishi VCRs' that had no power. :problem:
I isolated the issue to be a completely shorted power transistor and appeared everything was great right after replacing it. However, after testing it with a tape and within something like a half hour I hear this tiny pop and then the picture on tape playback went berserk. Been testing mostly the mechanical side including dirty heads and nothing unusual. I'm thinking the issue might be dried up caps causing power issues on some parts of the VCR as this is an 87' model that's built w/ multiple circuit boards so any oddities could occur (unlike newer machines w/ just one board and switching power supplies).
Anyway, this is about a CLD-99. Start from the AC cord and work your way in to see about finding shorts. Could very well be a transistor or maybe an ICP protector that popped. |
|
|
Jump to forum Jump to topic |
| ldfan |
|
Posted: 12 Oct 2020, 02:46
|
|
|
Just to throw my two cents in even though it's a guess...
Maybe try and re-seat all the ribbon cables from the laser pick-up, to the flipping mechanism, and to the main board just to see if it could be a loose connection or even a condensation issue. Did you say that you did see the red LED on the pick-up flashing on? |
|
|
Jump to forum Jump to topic |
| ldfan |
|
Posted: 23 Oct 2020, 21:26
|
|
|
Were you able to contact them to see if they are still in stock?
I think the last time I tried to buy one 15+ years ago, they were already gone which might also explain why there is no button available to put it in a cart. |
|
|
Jump to forum Jump to topic |
| ldfan |
|
Posted: 27 Oct 2020, 01:58
|
|
|
This is the exact one I have used for the last 20+ years.....
https://www.amazon.com/Power-Punch-Sheet-Compound-Leverage/dp/B07C76VBKW/ref=pd_lpo_469_t_2/147-0506681-6850404?_encoding=UTF8&pd_rd_i=B07C76VBKW&pd_rd_r=1f319f55-44a3-4c71-bce7-ae4de8424e88&pd_rd_w=Hf9GQ&pd_rd_wg=HXAb6&pf_rd_p=7b36d496-f366-4631-94d3-61b87b52511b&pf_rd_r=0SM53SPRW6ED72RS2HGZ&psc=1&refRID=0SM53SPRW6ED72RS2HGZ
I think I use the largest punch size in the kit and I then slightly enlarged it w/ a reamer tool similar to this....
https://www.amazon.com/YaeKoo-Tapered-Reamer-Chamfer-Drilling/dp/B081W3WZ3W/ref=sr_1_2?c=ts&dchild=1&keywords=Hand+Reamers&qid=1603761145&refinements=p_n_feature_seven_browse-bin%3A5485702011&s=industrial&sr=1-2&ts_id=256298011 |
|
|
Jump to forum Jump to topic |
| ldfan |
|
Posted: 28 Oct 2020, 07:55
|
|
|
Did more research on that DA1 chip and now I am thinking the digital out could be pin 1. Here is a schematic I found on the chip.
https://i.vgy.me/cuquK3.png
On the schematic for the Marantz, DP-870, the pin is currently not connected to anything so that could be a good hint it's the correct point. |
|
|
Jump to forum Jump to topic |
| ldfan |
|
Posted: 30 Oct 2020, 21:50
|
|
|
Interesting on the DB25 connector. It looks like it is just 5.1 out though from the SM.
The DB25 was the other option to having six standard RCA cables mated from a processor to an AV Receiver or AV Pre-Amp. They essentially function in the same manner. There is still no digital output from a DB-25.
If one ends up w/ the ED-901, you can make or even purchase an adapter that goes from DB-25 to six RCA cables. Here is an example of one...
https://www.infinitecables.com/audio-and-pro-audio-cables/snake-cables/6-channel-db25-to-rca-snake-cables/premium-phantom-db25-male-to-6-x-rca-male-6-channel-snake-cable-thx-pinout/
I wish we could get a kit made (printed board, passive components, and enclosure) where all we would have to do is solder a donor Pioneer demodulation IC.
Now I'm thinking these processors that utilize the LC8904Q chip are not designed to accommodate with any ease the inclusion of a digital output. I know that the kit I purchased to add a digital out to my CLD-M90 had a very extensive list of chips that would work with it but not the LC8904Q. At most, the digital out signal on LC8904Q might be coming off of several pins that might need to be combined in a special manner on a secondary board to create a proper S/PDIF digital signal. Gotta do more research on it. |
|
|
Jump to forum Jump to topic |
| ldfan |
|
Posted: 05 Nov 2020, 23:40
|
|
|
What may be the cause when the door hinges and needs a slight friendly push for the tray to complete the loading cycle? I have two Panasonic players (LX-1000u) that exhibit the same problem, but once in a while they close by themself. I went for the service manual but I didn't get any smarter what may be causing this, but can it be the loading belt (VDV022) for the tray that needs replacing? I cannot find a compatible belt in the PDF provided by Kurtis.
If the issue is just the door being held up (nothing to really do with the tray movement), this was actually a known issue back in the day when the machine was new.
Panasonic found the problem to be the door needing a minor shave down where it basically had some trouble clearing the tray. You should look @ this carefully to see where the hang up occurs, mark off the section, remove the door, and then use maybe a file or sanding device to shave it down (but not too much where it might deface what the door looks like from the front). |
|
|
Jump to forum Jump to topic |
| ldfan |
|
Posted: 27 Nov 2020, 10:43
|
|
|
That would be great. I can use all the help I can get.
Finally got some time to get some pics posted. These pics are a mix of three mods I did on my Pioneer, CLD-D701, Denon, LA-3100, and ProScan, PSLD43.
I first start off by removing the entire back panel and picking a spot that is in a nice open area that won't get in the way of anything mechanical on the other side (e.g.: the moving tray or turn mechanism). In addition, I try to avoid punching a hole out over any graphics on the back panel just for the sake of making the mod look nice.
https://i.vgy.me/eZxZcQ.jpg
As I stated in a previous post, I use a hole punch instead of a drill bit (forgot the punch size but it's about the diameter of the RCA jack) as my preferred method as there is less chance of slipping and damaging the back panel.
https://i.vgy.me/8LWpn4.jpg
In addition, I still need to utilize a reamer to slightly enlarge the hole in order the for plastic washer to fit snugly into it (the RCA jack will never touch the casing itself).
https://i.vgy.me/IJ5QIS.jpg
The RCA jack now installed (plastic washer is now painted black to match the back panel).
https://i.vgy.me/GKjNaE.jpg
https://i.vgy.me/aU0Tjy.jpg
The back panel can now to be reattached to the player and now it's time to mount the AC3-RF board. I used a plastic standoff to lift the AC3 board above the main board for this particular player (for your CLD-97, you may not be able to do this so double stick tape is an option). You should pick a spot that will be as close to the AFM point as you want to make a coax lead as short as possible to the board (as you can see, I already have the AFM coax cable and yellow mute lead soldered to their respective points).
https://i.vgy.me/5awyLG.jpg
Next step is to prep the coax cables that will be needed for delivering signal to and from the AC3-RF board and make sure to make them only as long as they need to be. You will need to make one cable w/ "both" ends that will look like this and tin the leads.
https://i.vgy.me/uesgI7.jpg
The other cable will have one end w/ the same GND extension as above but the other end will have the GND wires cut off and then surrounded in a shrink tube.
https://i.vgy.me/YpmUy7.jpg
A more close up shot of how the wires will look connected to the board. Note how the coax cables connect to it w/ the extended GND. (Also, ignore the doubling of wires I have on the blue and black wires as that was done for an alternate mod on this particular player).
https://i.vgy.me/asBFCf.jpg
Finally, the RCA jack being connected up w/ the coax wire. Note where the wires connect on the jack and the installed cap on the GND wire that goes back to chassis GND.
https://i.vgy.me/YlQSwX.jpg
I end the mod by providing my own label (and try to keep the font the same as the other labeling on the unit) so that it's obvious what this jack is meant for. (The labeling would usually say "AC3 RF Out" but this particular mod also had an RF Demodulator installed so it had to be called an "AC3 Digital Out")
https://i.vgy.me/yJesB0.jpg
To test if your new AC3-RF output works, you can stick a voltmeter on the RCA jack (red probe on middle pin and black probe on GND) and should get a reading anywhere from 3.6v to 4.5v when an AC3 disc is in play and 0v when the disc is paused or stopped.
Hope you find this useful. |
|
|
Jump to forum Jump to topic |
| ldfan |
|
Posted: 02 Dec 2020, 19:39
|
|
|
| In my humble opinion, if the unit does not have any burning smell coming from it and the player is working fine, I would not worry about it. Worst case scenario is that it just shorts itself out one day and you worry about it then. |
|
|
Jump to forum Jump to topic |
| ldfan |
|
Posted: 02 Dec 2020, 19:47
|
|
|
The only way to know for sure if the disc or the player is the issue would be to play this disc on another player to see if the issue occurs on it as well.
This could be a mastering issue on the disc itself as I did have a copy of Robinson Crusoe On Mars that had video issues toward the end and all my players couldn't play through it. Also, my copy of Vertigo (AC3) has issues playing toward the end on the CAV supplemental material but only on my ProScan player. All my other players play it fine so the ProScan probably needs a slight adjustment to correct the problem. Otherwise, the player plays everything else completely fine like 98% of the time.
Laser rot should never, in my opinion, affect overall playback performance unless it's very severe. Also, a warped disc could have an issue but it has to be extremely warped and most disc are never completely flat anyway. |
|
|
Jump to forum Jump to topic |
| ldfan |
|
Posted: 03 Dec 2020, 20:13
|
|
|
You should only open up a player if it's absolutely necessary.
I do open my players quite a bit but only because I work on AC3 mods or if the player is broken & it obviously needs to be worked on (never felt a need to clean a player unless it started out really grimy). If you are so OCD about your player breaking down, you pretty much need to do what a majority of us do to keep our collections viewable and that is to acquire as many back up players as you can. God knows my wife is pissed @ me now for having accumulated 14 players :roll:. |
|
|
Jump to forum Jump to topic |
| ldfan |
|
Posted: 04 Dec 2020, 07:40
|
|
|
So..... it has been about 8 months since I last spoke about my audio cutting out issue on this processor and I'm just going to be honest that the issue has never been fully resolved and I decided it was getting ridiculous to keep jumping the gun that I had finally fixed it. Thus, I decided to spend these last few months tinkering away and really trying to be patient and document all the changes I made to the unit and noting where the unit improves or gets worse in certain aspects. Anyway, what I am about to write in this post does not mean that I did finally fix the problem but I will say the unit has gotten impressively better to the point that I now feel confident that I can write up this update.
Here is timetable of the progress I made.....
4/13/20 - 7/15/20
This was right after I changed out caps C235 and C236 as noted in the last addendum of the first post. The overall experience I had with the unit for these three months was a combination of losing sound with or without a click on the relays. Also, I found that switching to the analog input and back would bring the sound back after a loss (vs. going between different digital inputs) so I felt that maybe I am having an issue w/ an input switching chip. However, there were times that the sound would disappear and any input switching wouldn't do a thing to fix it and @ that point I shut the unit down and then it would return. Later on, I also found that sometimes running the test tone after a sound loss would bring the sound back so now I was thinking the control IC was now an issue and that would be frustrating to verify. In any case, these issues were very sporadic during this three month test so there were times the processor was just on fire and never glitching and then suddenly it would just glitch continuously for an entire day. It was now time to tackle something new inside the unit to get this glitch under control.
7/16/20 - 9/19/20
I decided to tackle the Phased Lock Loop board and replace the two caps on it.
https://i.vgy.me/b3dIEp.jpg
https://i.vgy.me/AwM8Xz.jpg
Just to get to the point, the next two months showed no noticeable improvement so now I was a little more confident this was not the issue. And the reason I was led to think the PLL board could be an issue was that I thought I heard a lot of the relay clicking coming from it but I was wrong in that assessment (I'll explain more later in the post).
9/20/20 - 11/13/20
My next approach was to focus on the A/D Converter chip and and replacing six caps in the general area. Here are the caps that I changed out....
https://i.vgy.me/TRj9zP.jpg
I focused on this area as I did start to notice some audio distortion issues when using the analog input and thought that maybe this had something to do w/ the audio lock issue as well. In addition, it appears that some of these caps were also directly tied into the input switching IC which I felt was still a possible issue. After I had them replaced, I tested the unit and it appeared to glitch even worse before the cap swap even to the point that the sound wouldn't come back until I shut down for a couple of hours and then it performed fine for the rest of the day. However, here is the weird part. The unit then performed fine for the next 35 or so days with only four occurrences in that time frame and I was really running it hard (having it on for up to six hours in a day at times). I was still not satisfied because it obviously still had the issues even though it was minimal. So.....
11/14/20 - 11/20/20
I went ahead and replaced five more of the caps in and around the AD Converter thinking that might really be causing the issue since I was pretty happy w/ the performance of the unit after the 9/20 cap replacement. Here are the caps that I replaced (kind of hard to see the red markings; my apologies).....
https://i.vgy.me/IFQDx2.jpg
The unit worked great for the next two days and suddenly the sound disappeared (can't recall if I heard a click or not of the relay) on 11/17 and basically never came back. It was functioning but I could not get any sound out of it at all and the relays completely stopped working. I tested the unit for the next few days to try and figure out this new issue as it never stayed dead like this before. I ran a test w/ the optical output of the unit to see if it could pass sound on it and unbelievably it was working fine passing PCM and DD from the Digital and AC3-RF inputs. Thus, if I could not fix the issue, it least the unit was still serviceable as an RF Demodulator. Now, the good news about this new dilemma did bring about a new perspective for me in that now it might be possible to finally find the real issue now that something was totally dead. And that led me to this now.....
11/21/20 - present
So.... I went back to the service manual and decided it was time to really look @ the relay circuit to see if I can follow it back to where the problem could be. I still felt the relay itself could not be the issue since this unit uses three of them to control the six analog audio outputs and it would seem pretty impossible for three relays to all die @ the same time. Thus, I found that all three did go through several transistors that ultimately lead back to IC150 which is the control IC of the unit. After looking @ the schematic of how this chip functions, I kept thinking there has to be something besides the chip itself that could be causing the issue and eventually I started to consider a ceramic oscillator (X-103) that was tied into pins 82 and 83.
https://i.vgy.me/gNgLSF.jpg
I did a lot of research to see if these types of oscillators had issues as they aged but I could not really find any relevant information. So at this point, I had nothing to lose but to take the unit apart again and examine this part. My plan was to desolder it from the board to see if maybe I could take it apart and look for anything odd. I ended up finding that I had previously reflowed it sometime back and the solder actually looked a bit clumpy to me. So I thought, maybe my last reflow job actually caused a cold solder connection and @ that point I decided to remove all the solder and resolder it from scratch. I had the unit re-assembled & power up and unbelievably I started to hear the click of the relays again. This was definitely great progress as I never had one fix that went from dead to alive in all the previous attempts. I have been testing the unit constantly since that time and I did have one occurrence of the sound going off but I'm not sure if it was really the unit as I was fumbling around w/ the wrong remote and accidentally switched an input on my TV that then created a mis-lock on the processor that brought the sound back.
Anyway, the big question now is if the unit is really fixed or not. The answer is still - "I don't know". I'm just waiting again for another glitch but so far this has been the most promising outcome in a long time. If I can get another two weeks or more of zero glitching, I'll feel more confident the issue is finally nailed down. If the glitch returns and the issue does tie into the relays clicking off again, I am contemplating replacing that X-103 oscillator (they are pretty cheap on ebay) since that does appear to be a key problem based on this latest repair. Also, in respect to all the caps that I did replace (29 all together + 1 super cap), I'm sure some of them were causing the audio distortion as well as the occasional loud bang on the speakers that did pop up along w/ the relay glitch as I have not had these types of issues since the last of the caps were installed (but we'll see).
Countdown to two weeks for the next update :roll:
Addendum for 12/8/2020 >>>>>> Didn't think I'd do a quick update so soon but tonight the unit did lose sound w/ the click of the relays going dead again. I tried to get the sound back by running the test tone and changing inputs but nothing worked. I ended up shutting down the unit for about 40 min to give it a break and the sound did return after that and was great for 4.5 hours until I shut it down for the night. It definitely sounds like my ceramic oscillator could be the issue so I placed an order for a pack of them that hopefully will arrive in two weeks. So, the update will be delayed but I'll keep checking the until then.
Addendum for 12/27/2020 >>>>>> The unit had another incident where it went completely dead on the relays again and nothing would get it going again so I thought it was now time to replace what I felt could be a bad ceramic oscillator. I opened up the unit and as I was unplugging the CN-102 and CN-101 ribbon cables, I decided to just plug them back in and power up the unit again. To my surprise, the unit's relays started to click again and now I think the issue might be caused by something on the display board. I did end up replacing the oscillator but due to some confusion on verifying its functionality I quickly put back in the old one (it appears that this unit needs the back panel screwed back in as it will malfunction due to what appears to be a grounding issue). In any case, I re-soldered a number of connections on the display board including the CN connectors and a few key components that could have cold solder. The unit has functioned fine since this time so we'll see how it goes. I plan to still replace the oscillator if the unit goes out again. |
|
|
Jump to forum Jump to topic |
| ldfan |
|
Posted: 05 Dec 2020, 01:33
|
|
|
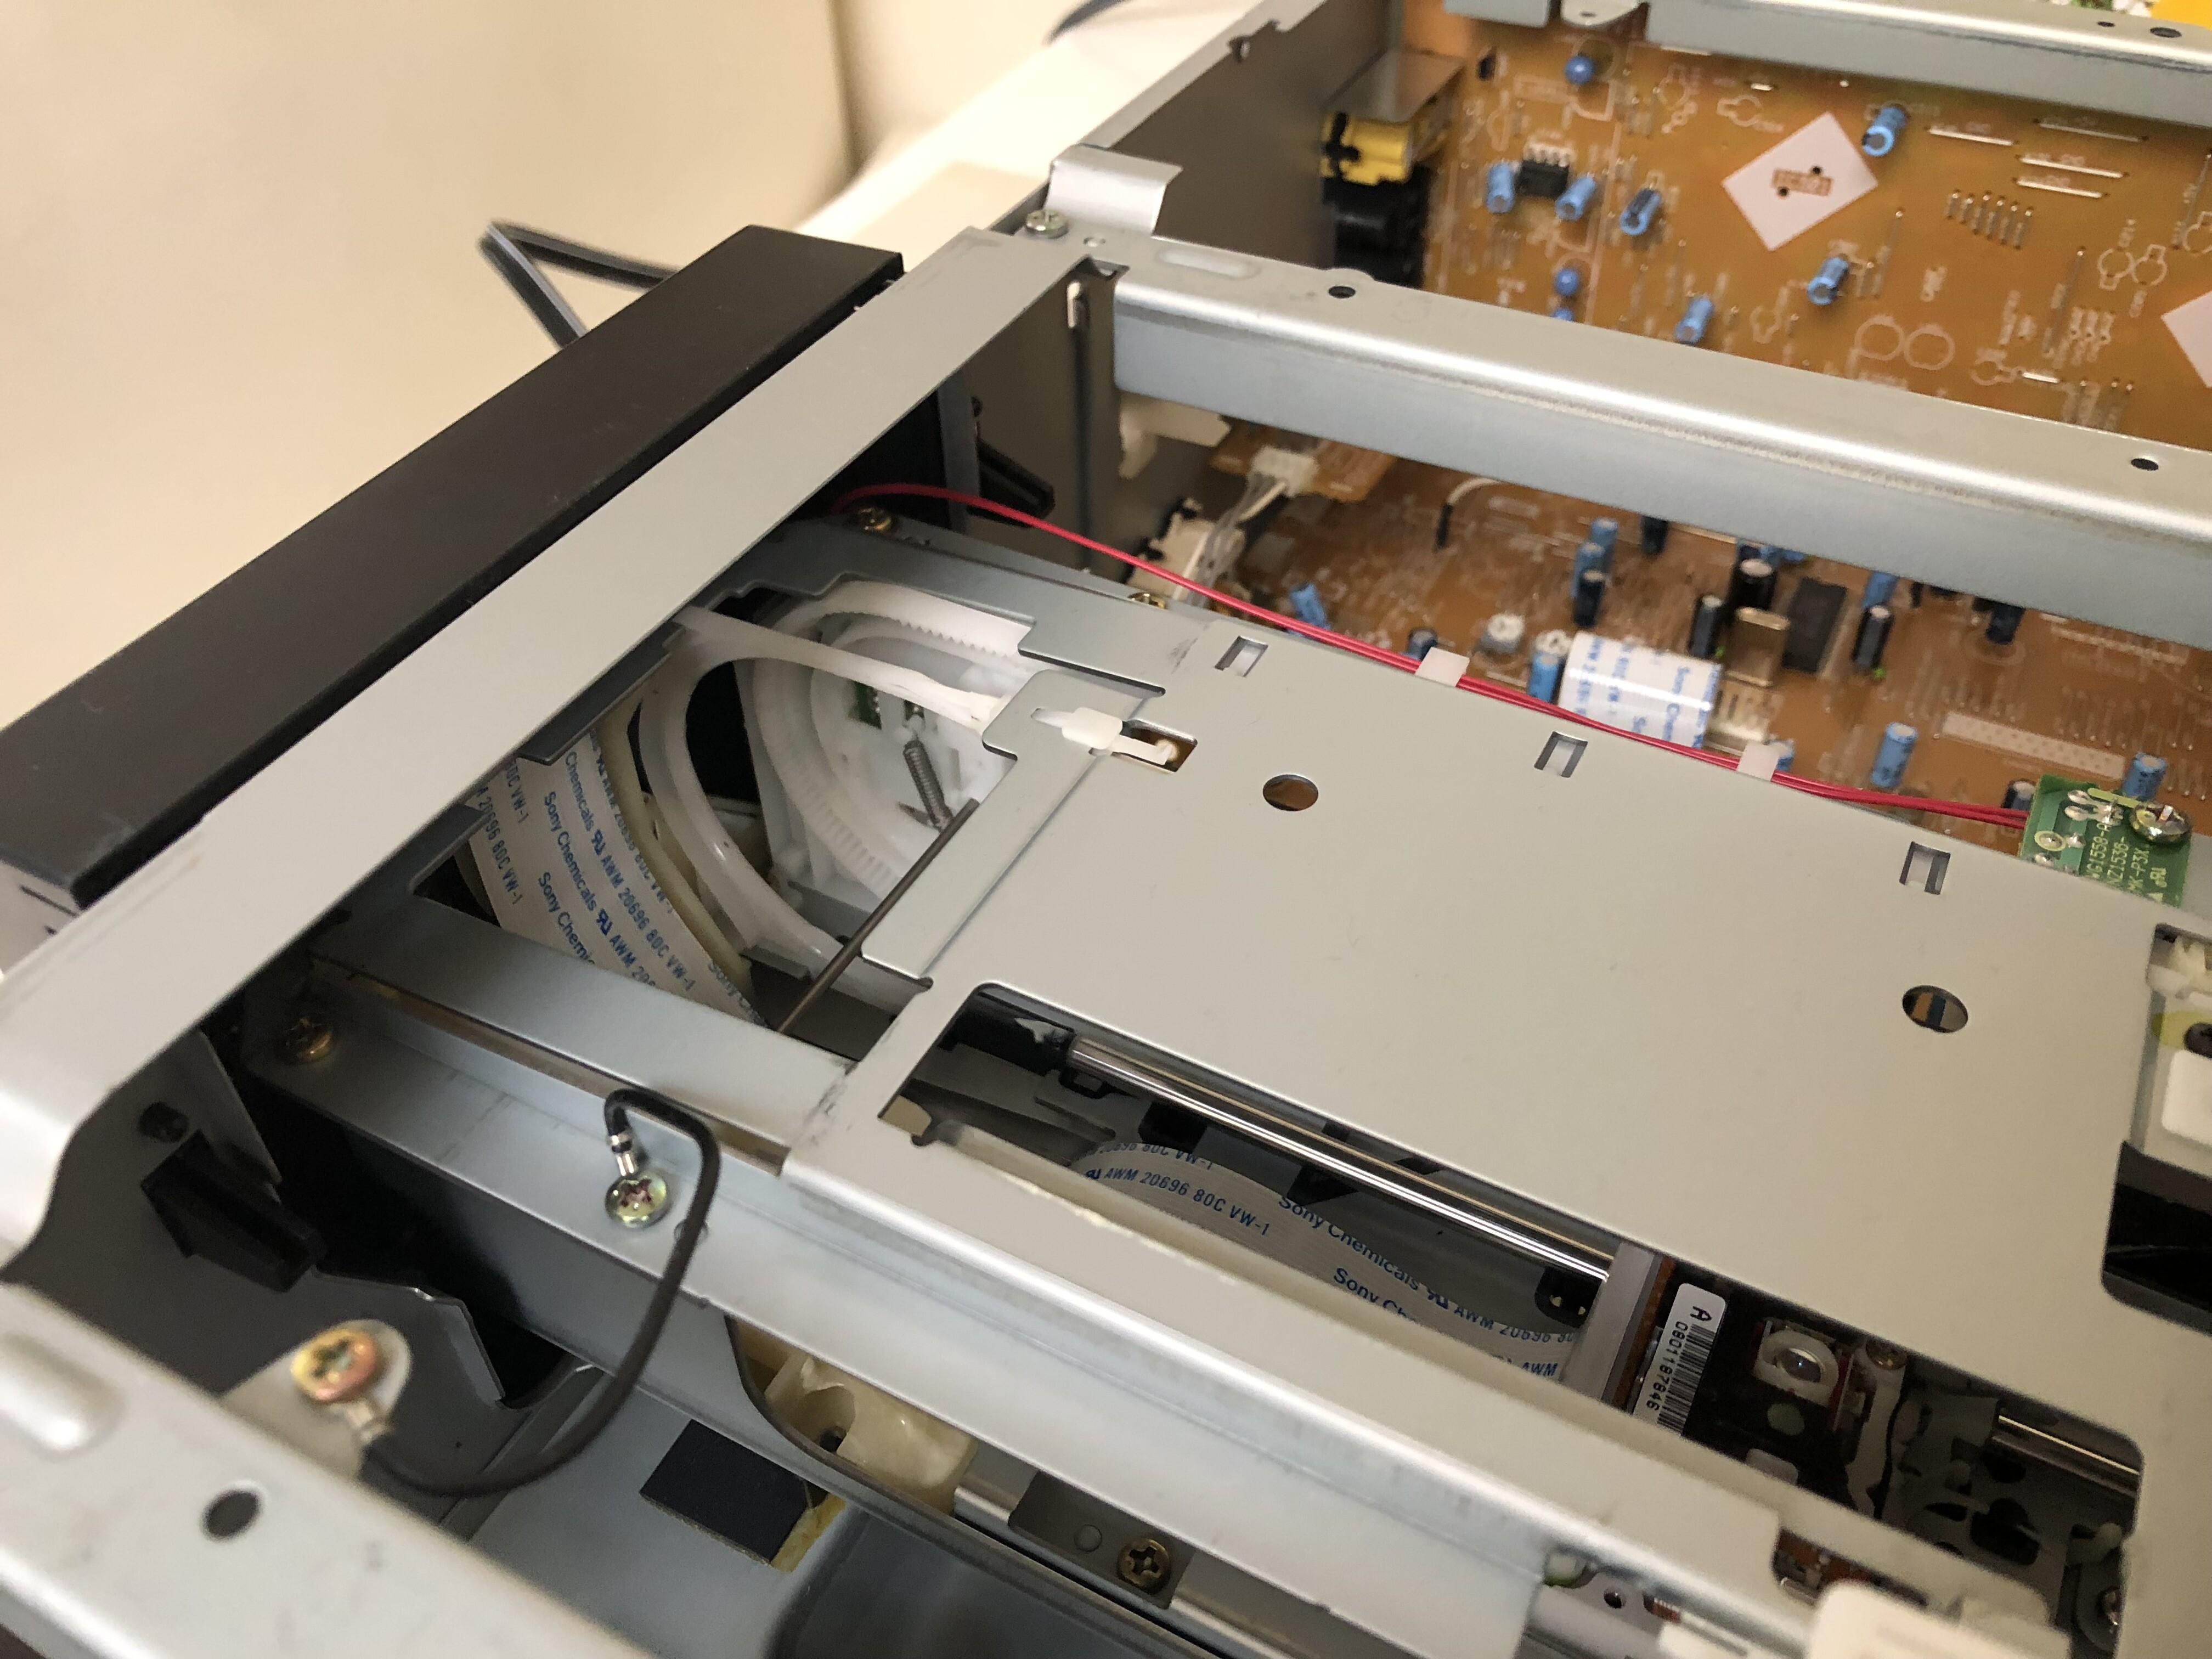
Not sure if this pic of my CLD-59 will help. Wished I got a better angle of the assembly.
 |
|
|
Jump to forum Jump to topic |
| ldfan |
|
Posted: 07 Dec 2020, 20:59
|
|
|
|
|
Jump to forum Jump to topic |
| ldfan |
|
Posted: 14 Dec 2020, 02:24
|
|
|
I agree with cplusplus but I'm leaning toward just the H670 needing some alignment.
My Pioneer 704 had such an issue when playing mainly Side B and it was the entire mechanism that was out of alignment by a few millimeters (probably dropped or dinged in shipping). I literally used my hand to bend it back ever so gently and used my 703 as a reference on where it needed to be. It has been great ever since.
It's definitely not a disc issue as you already proved that to yourself in that the bad discs played fine on the 900. |
|
|
Jump to forum Jump to topic |
| ldfan |
|
Posted: 14 Dec 2020, 08:39
|
|
|
How do I align the lx-h670? Is there a video to help me through the process? I know on the Sega Dreamcast it's as simple as turning a small screw like object to make the laser read discs better. Is it similar on laserdisc players? What do you mean bend something? Something is bent out of shape in my lx-h670?
I did not imply that your player has the same bent mechanism issue as my player but definitely something is affecting it.
The best approach at this point is to open the unit and play the offending discs @ the exact point you are having the issue and simply observe what is going on. You have to be patient in this regard since you really don't want to mess with anything until you can see what is happening and relay what you see to us. Once we have have more info, we can do our best to provide a logical next step. |
|
|
Jump to forum Jump to topic |
| ldfan |
|
Posted: 14 Dec 2020, 18:47
|
|
|
| Funny that you brought this up as I had an issue w/ unstable still frame images on my former Samsung LCD TV from 2008. The issue appears to be the TV just having an issue locking it's sync into the composite signal and the only way I resolved it was to replace my TV. I am now using a 2011 Panasonic plasma and it has been perfect. |
|
|
Jump to forum Jump to topic |
| ldfan |
|
Posted: 14 Dec 2020, 18:56
|
|
|
Are saying that the wobble seems more pronounced on the H670 vs. the 900?
If that is the case, then maybe the H670 clamper is not properly locking down the disc. I have 12 working players and none of them (except the 704 I mentioned before that is now fixed) have ever had a skipping issue because of a warp. |
|
|
|